
Introduction
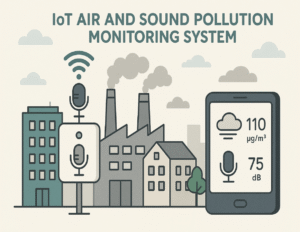
The IoT air and noise pollution monitoring system is designed to supervise air quality and noise levels in real-time. It uses sensors to detect dangerous gases and acoustic pollution in the environment. Air pollution is detected through the MQ-135, which perceives CO₂, ammonia, alcohol, smoke, etc. Noise levels are recorded using a microphone or sound sensor. The collected data is sent to an IoT platform such as Thingspeak or Blink. This allows users to see pollution levels in real-time from anywhere via the Internet. It helps to identify areas of high pollution and to plan preventive measures. This system is compact, low power consumption, and operates 24/7. It is useful in smart cities, industries, high-traffic areas, and schools. An LCD or LED indicator can provide real-time visual feedback. It uses Wi-Fi (through NodeMCU or ESP8266) for cloud connectivity. Alerts can be displayed in a mobile app when limits are exceeded. It raises awareness about environmental protection and public health. This system promotes green technology and sustainability. With the right update, it can also control cleaners or alarms. It is a great example of IoT + sensors + smart monitoring.
Hardware Components (Written Form)
Component | Quantity | Purpose |
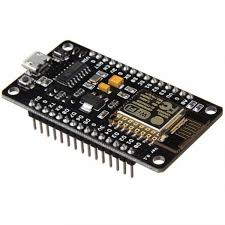
NodeMCU ESP8266 | 1 | Wi-Fi-enabled microcontroller for IoT |
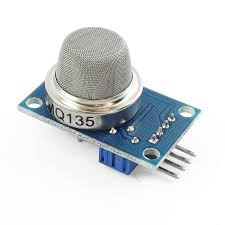
MQ-135 Gas Sensor | 1 | Detects CO₂, NH₃, alcohol, smoke, benzene |
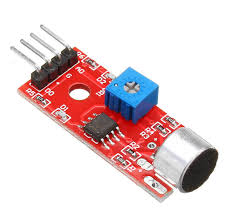
Sound Sensor (KY-038) | 1 | Detects sound level in environment |
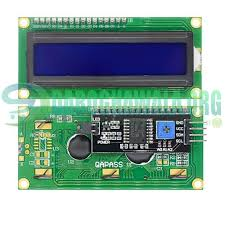
16×2 LCD Display (I2C) | 1 | Displays live sensor values (optional) |
I2C Module | 1 | Connects LCD to NodeMCU easily |
Breadboard + Jumper Wires | Several | Wiring |
USB Cable | 1 | Powering NodeMCU |
Resistors (10kΩ) | 1–2 | For voltage divider if needed |
NodeMCU ESP8266:
|
MQ-135 Gas Sensor:
|
Sound Sensor (KY-038):
|
16×2 LCD Display (I2C):
|
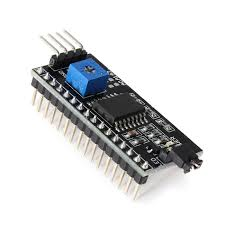
I2C Module:
|
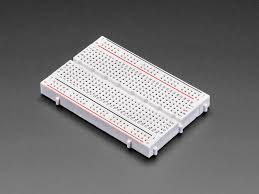
Breadboard:
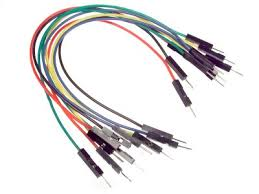
Jumper Wires:
|
|
Resistors (10kΩ):
|

🔌 Wiring Components (Written Form)
🔸 MQ-135 Sensor
- VCC→ NodeMCU 3V
- GND→ NodeMCU GND
- AOUT→ NodeMCU A0
🔸 Sound Sensor (KY-038)
- VCC→ NodeMCU 3V
- GND→ GND
- A0→ NodeMCU D2 (or any digital/analog pin)
🔸 LCD with I2C (optional)
- SDA→ NodeMCU D2
- SCL→ NodeMCU D1
- VCC→ 3.3V
- GND→ GND
💻 Code for NodeMCU with ThingSpeak (IoT Platform)
#include <ESP8266WiFi.h>
#include <Wire.h>
#include <LiquidCrystal_I2C.h>
#include <ESP8266HTTPClient.h>
#include <WiFiClient.h>
// LCD Config (optional)
LiquidCrystal_I2C lcd(0x27, 16, 2);
// WiFi Credentials
const char* ssid = “Your_SSID”;
const char* password = “Your_PASSWORD”;
// ThingSpeak Settings
String apiKey = “YOUR_THINGSPEAK_API_KEY”;
const char* server = “api.thingspeak.com”;
// Sensor Pins
#define MQ135_PIN A0
#define SOUND_PIN D2
void setup() {
Serial.begin(115200);
WiFi.begin(ssid, password);
lcd.begin();
lcd.backlight();
while (WiFi.status() != WL_CONNECTED) {
delay(500);
Serial.print(“.”);
lcd.setCursor(0, 0);
lcd.print(“Connecting WiFi”);
}
Serial.println(“WiFi Connected!”);
lcd.clear();
lcd.print(“WiFi Connected!”);
}
void loop() {
int airQuality = analogRead(MQ135_PIN);
int soundLevel = analogRead(SOUND_PIN);
Serial.print(“Air Quality: “);
Serial.println(airQuality);
Serial.print(“Sound Level: “);
Serial.println(soundLevel);
lcd.setCursor(0, 0);
lcd.print(“Air: “);
lcd.print(airQuality);
lcd.print(” “);
lcd.setCursor(0, 1);
lcd.print(“Sound: “);
lcd.print(soundLevel);
// Send to ThingSpeak
if (WiFi.status() == WL_CONNECTED) {
WiFiClient client;
HTTPClient http;
String url = “http://api.thingspeak.com/update?api_key=” + apiKey +
“&field1=” + String(airQuality) +
“&field2=” + String(soundLevel);
http.begin(client, url);
int httpCode = http.GET();
if (httpCode > 0) {
Serial.println(“Data sent to ThingSpeak.”);
} else {
Serial.println(“Error sending data.”);
}
http.end();
}
delay(15000); // ThingSpeak allows 15 sec interval
}