
Introduction
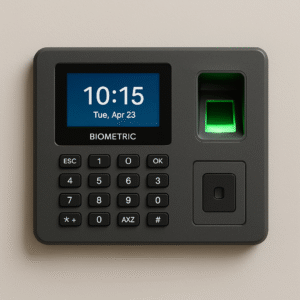
The biometric attendance system is a modern solution through IoT that automates attendance using fingerprints. It replaces traditional roll calls and manual records, making attendance accurate and secure. This system uses a fingerprint sensor to uniquely identify individuals. Once the fingerprint is verified, it automatically registers attendance. This information is sent to the IoT cloud (such as ThingSpeak or Firebase) via the ESP8266 module. It allows remote access to attendance records in real-time from anywhere. It increases productivity in schools, colleges, offices, and restricted areas. Only registered users can mark attendance, preventing false records. Each scan can record the name, identification number, time, and date. It can include an LCD or a web control panel to see the status in real-time. This system increases transparency and accountability. It is scalable for hundreds of users using fingerprint templates. Optional feedback through a buzzer or LED provides confirmation of success or failure. It is energy efficient, easy to install, and cost-effective. This system combines biometrics, microcontrollers, and IoT to automate itself. It is a future solution for attendance monitoring with minimal human effort.
Hardware Components (Written Form)
Component | Quantity | Description |
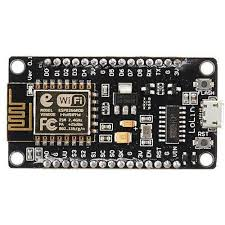
NodeMCU (ESP8266) | 1 | Sends data to IoT cloud |
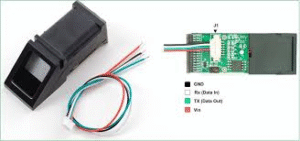
Fingerprint Sensor (R305/GT-511C3) | 1 | Captures biometric fingerprints |
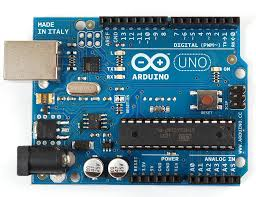
Arduino Uno (optional) | 1 | Interface fingerprint module, if needed |
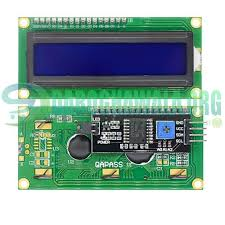
I2C LCD (16×2) | 1 | Displays attendance status |
Buzzer (Optional) | 1 | Beeps on successful scan |
LEDs (Red/Green) | 2 | Visual feedback for scan status |
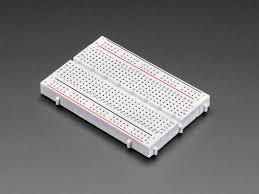
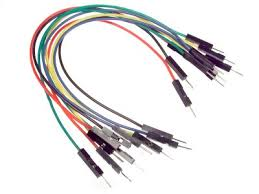
Breadboard + Jumper Wires | Several | Connections |
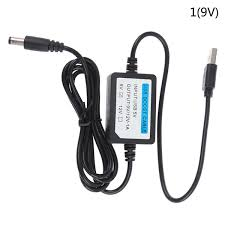
USB Cable / Power Source | 1 | Power supply for NodeMCU/Arduino |
NodeMCU (ESP8266):
|
Fingerprint Sensor (R305/GT-511C3):
|
|
Arduino Uno (optional):
|
I2C LCD (16×2):
|
Buzzer (Optional):
|
|
Breadboard:
Jumper Wires:
|
USB Cable / Power Source:
|

🔌 Wiring Components (Written Form)
🔸 Fingerprint Sensor to NodeMCU or Arduino
(If using R305 type 3.3V compatible sensor, else use Arduino and serial communication)
- VCC→ NodeMCU 3V (or Arduino 5V if using Uno)
- GND→ GND
- TX→ NodeMCU D7 (GPIO13) (or Arduino RX)
- RX→ NodeMCU D6 (GPIO12) (or Arduino TX)
🔸 LCD (I2C) to NodeMCU
- SDA→ NodeMCU D2 (GPIO4)
- SCL→ NodeMCU D1 (GPIO5)
- VCC→ NodeMCU 3V (or use 5V with logic converter)
- GND→ GND
🔸 Buzzer / LEDs
- Buzzer +→ NodeMCU D5 (GPIO14)
- Green LED +→ NodeMCU D3 (GPIO0)
- Red LED +→ NodeMCU D4 (GPIO2)
- All cathodes (–) → GNDvia 220Ω resistor
💻 Arduino/NodeMCU Code (Basic Version)
#include <Adafruit_Fingerprint.h>
#include <SoftwareSerial.h>
#include <ESP8266WiFi.h>
#include <ESP8266HTTPClient.h>
const char* ssid = “YOUR_WIFI_SSID”;
const char* password = “YOUR_WIFI_PASSWORD”;
const char* server = “http://api.thingspeak.com/update”;
String apiKey = “YOUR_THINGSPEAK_API_KEY”;
// Connect fingerprint sensor
SoftwareSerial fingerSerial(D6, D7); // RX, TX
Adafruit_Fingerprint finger = Adafruit_Fingerprint(&fingerSerial);
void setup() {
Serial.begin(9600);
finger.begin(57600);
WiFi.begin(ssid, password);
Serial.print(“Connecting to WiFi…”);
while (WiFi.status() != WL_CONNECTED) {
delay(1000);
Serial.print(“.”);
}
Serial.println(” Connected!”);
if (finger.verifyPassword()) {
Serial.println(“Fingerprint sensor detected.”);
} else {
Serial.println(“Fingerprint sensor not found :(“);
while (1);
}
}
void loop() {
getFingerprintID();
delay(2000); // Delay between scans
}
void getFingerprintID() {
uint8_t p = finger.getImage();
if (p != FINGERPRINT_OK) return;
p = finger.image2Tz();
if (p != FINGERPRINT_OK) return;
p = finger.fingerSearch();
if (p != FINGERPRINT_OK) {
Serial.println(“User not recognized”);
return;
}
Serial.print(“User ID: “);
Serial.println(finger.fingerID);
sendToThingSpeak(finger.fingerID);
}
void sendToThingSpeak(int id) {
if (WiFi.status() == WL_CONNECTED) {
HTTPClient http;
String url = server;
url += “?api_key=” + apiKey + “&field1=” + String(id);
http.begin(url);
int httpCode = http.GET();
if (httpCode > 0) {
Serial.println(“Data sent to ThingSpeak.”);
}
http.end();
} else {
Serial.println(“WiFi not connected.”);
}
}